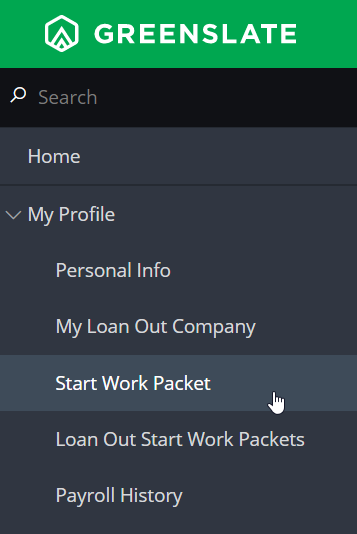
Step 1: Under My Profile on the left, click START WORK PACKET.
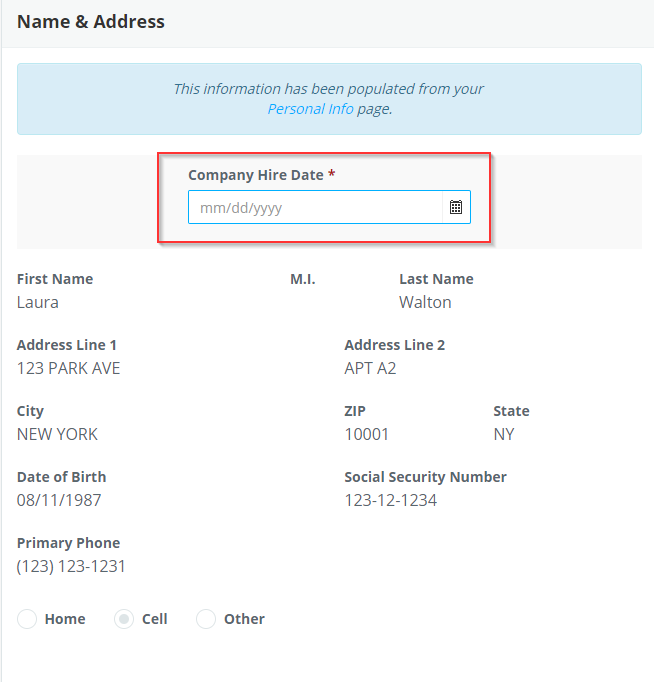
Note: Some required fields of the I-9 will be populated from the Personal Info, under My Profile. The Personal Info is required to be completed before starting the I-9
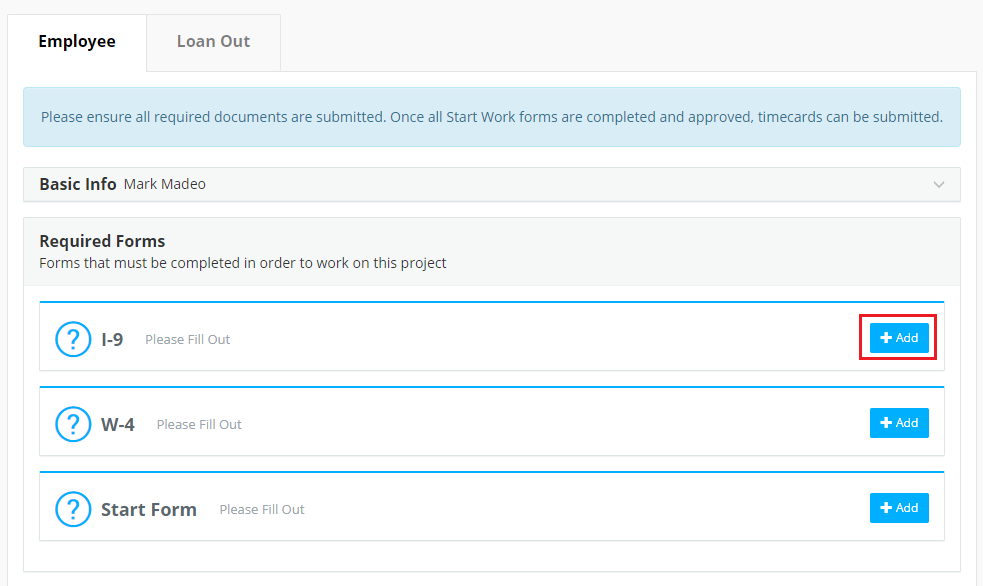
Step 2: Click ADD in the I-9 field.
Step 3: Enter your hire date.
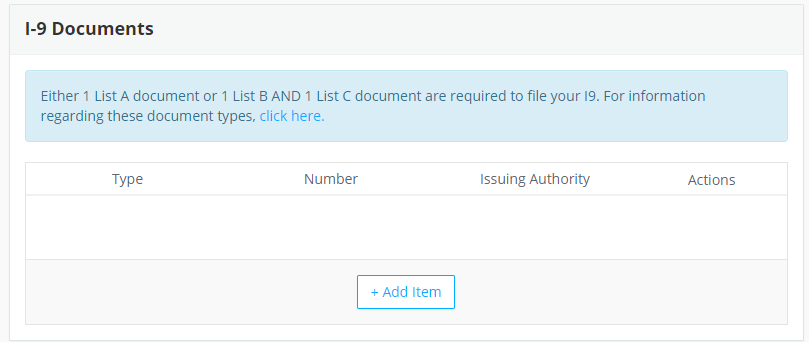
Step 4: Add your I-9 documents in the I-9 Documents field. Click ADD ITEM.
Step 5: Enter the issuing authority, the document number, select the document type from the drop down menu and enter the expiration date, if applicable. Add a photo of the front of the document:
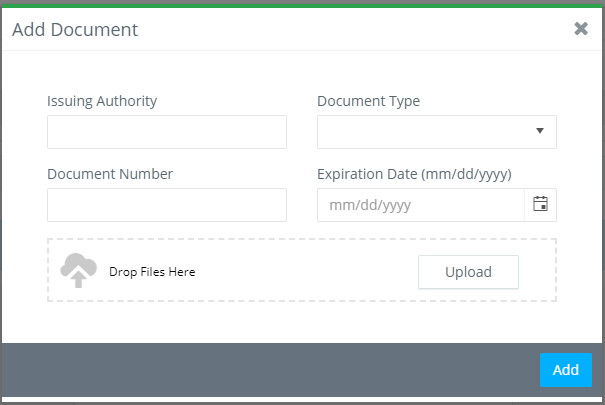
Step 6: Click ADD.
Note: You must add either 1 document from List A or 1 document from List B and 1 document from List C. For information on I-9 document types, you can click here
Step 7: Click SUBMIT.
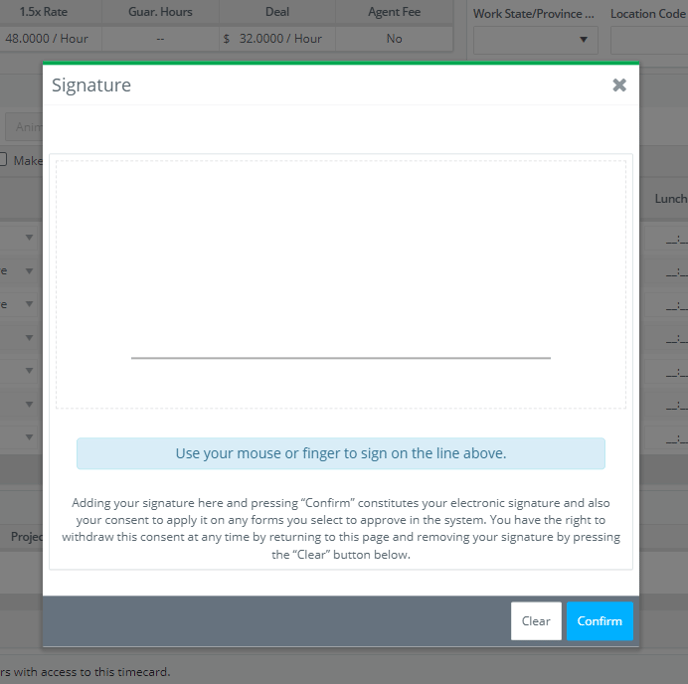
Step 8: If necessary, sign the document. Use the left mouse button while signing on a desktop computer or use your finger or a stylus if on a mobile device or tablet.
Note: Your signature will be saved for future approvals after you have completed this step once.