How to: Create a Bill Payment (Video)
Welcome to our guide on how to use the Bill Payment feature in GreenSlate.
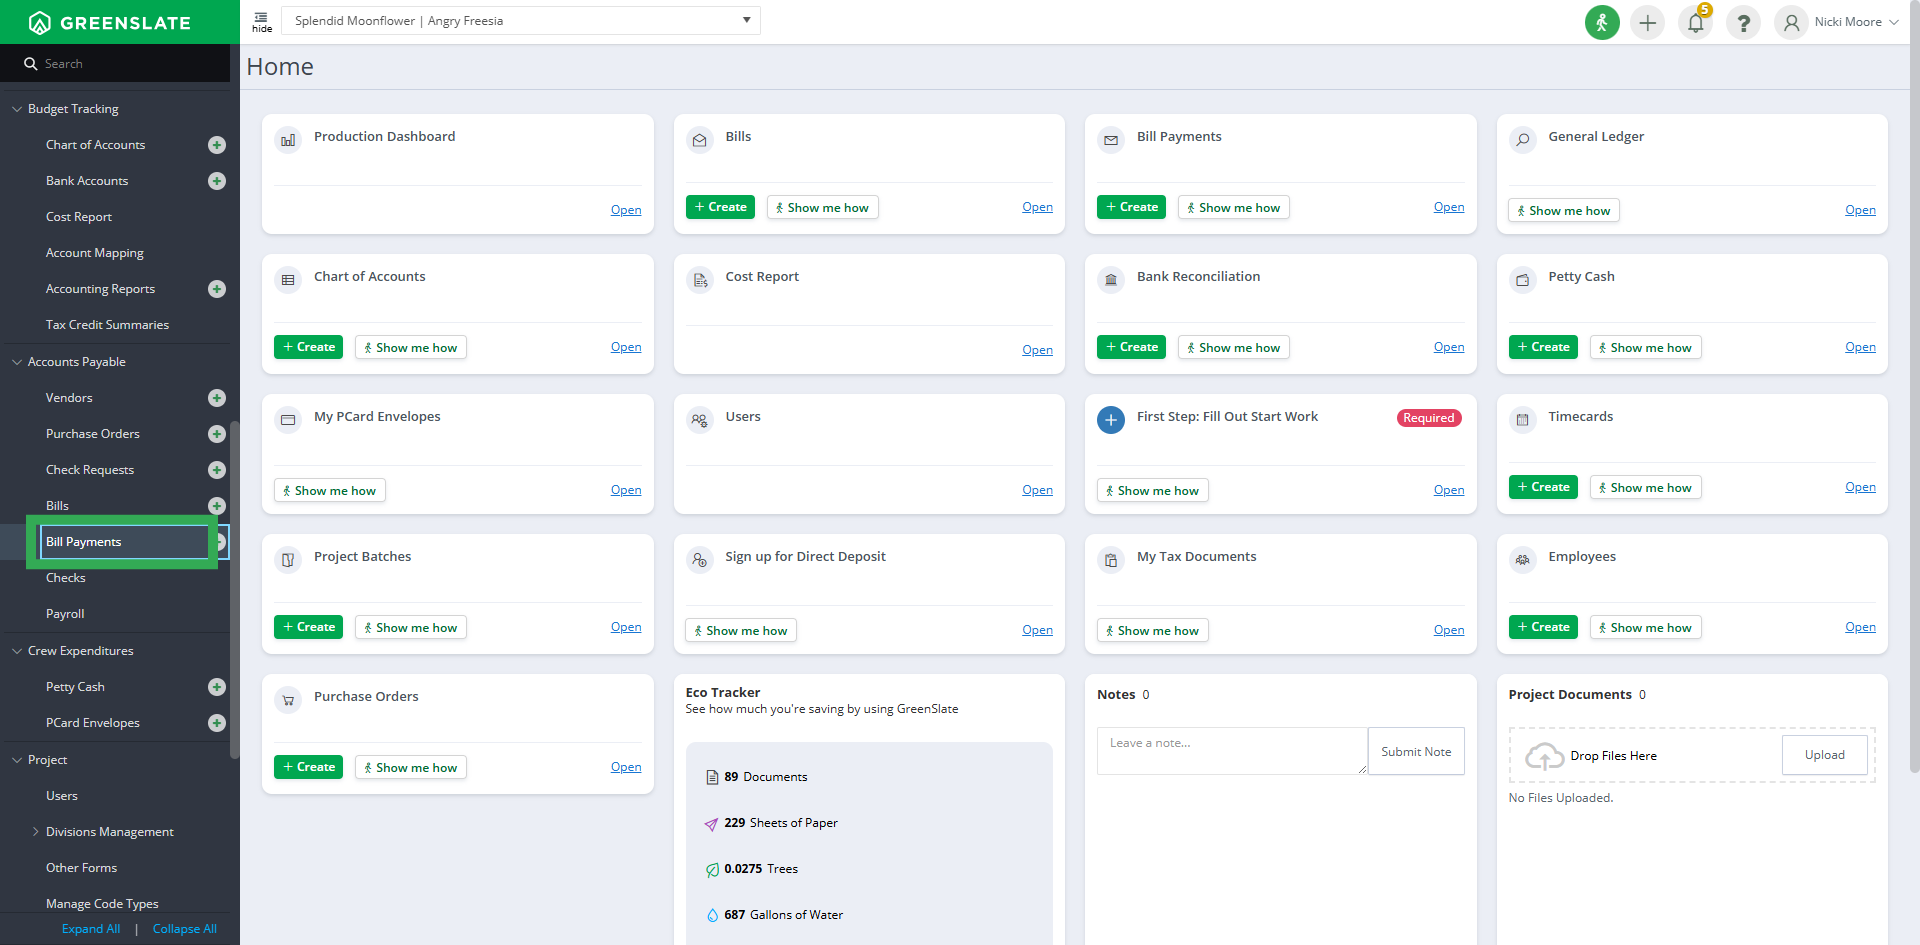
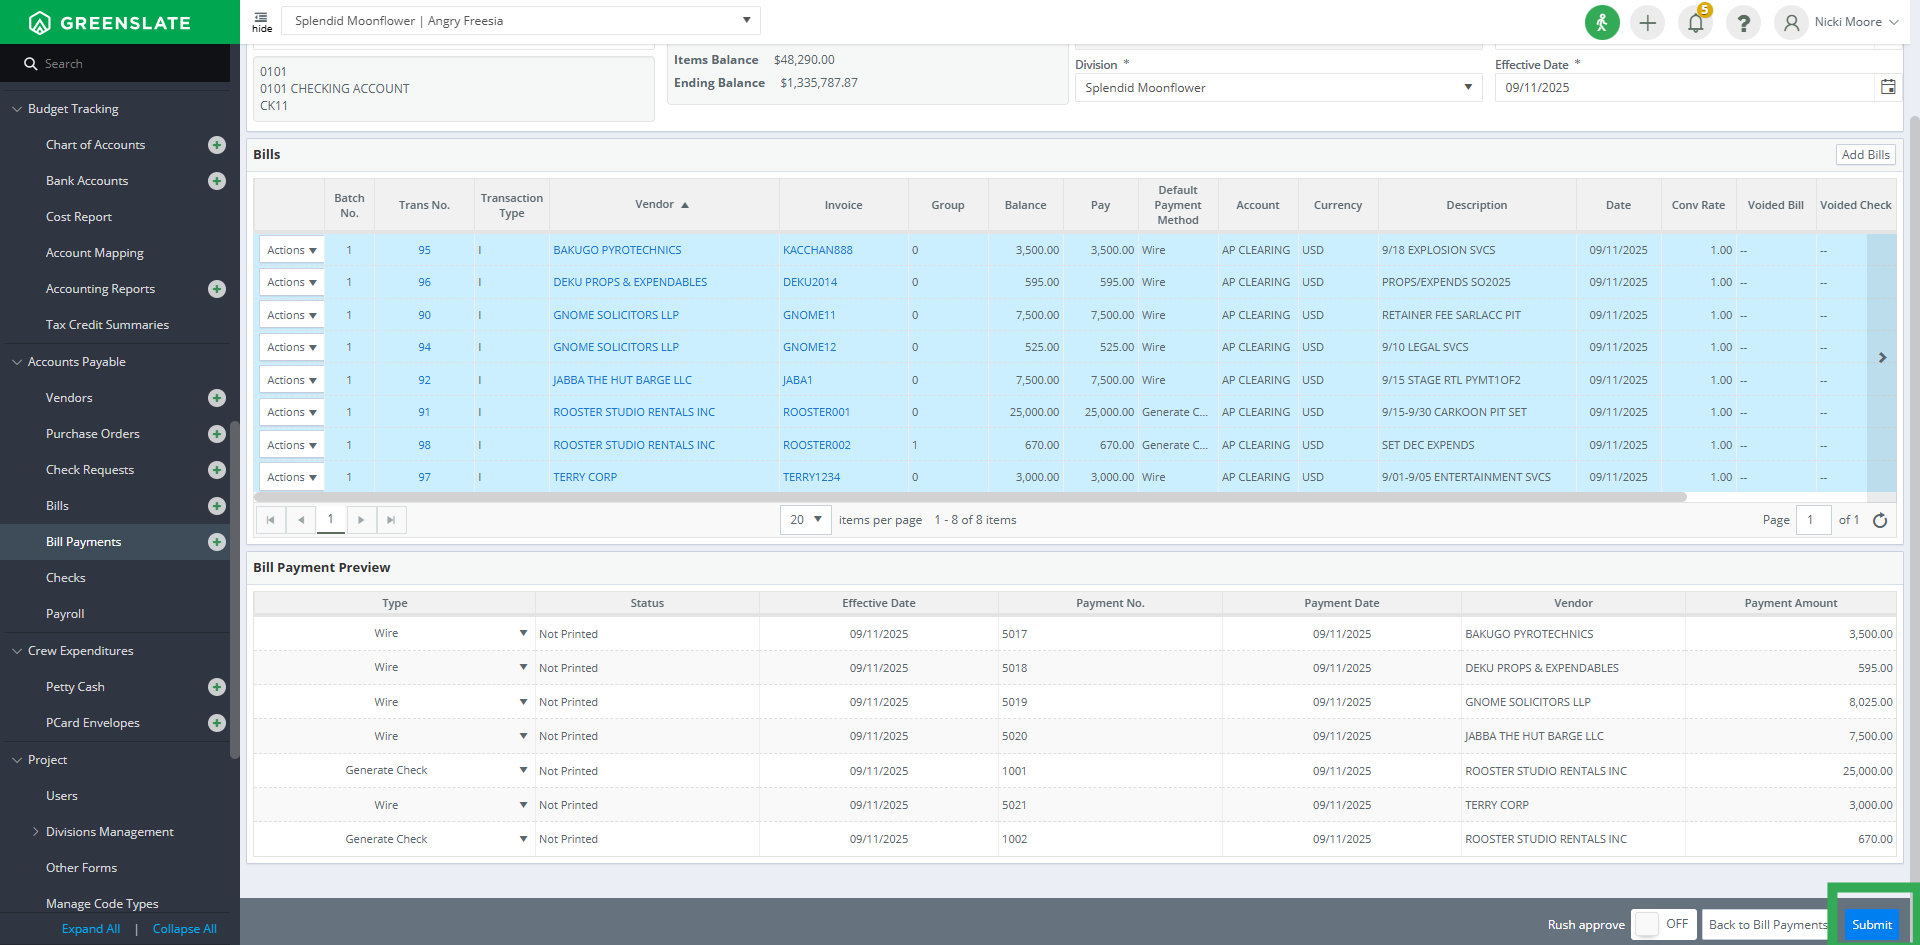
1. Click "Bill Payments"
First, navigate to "Bill Payments" in the left-hand menu.
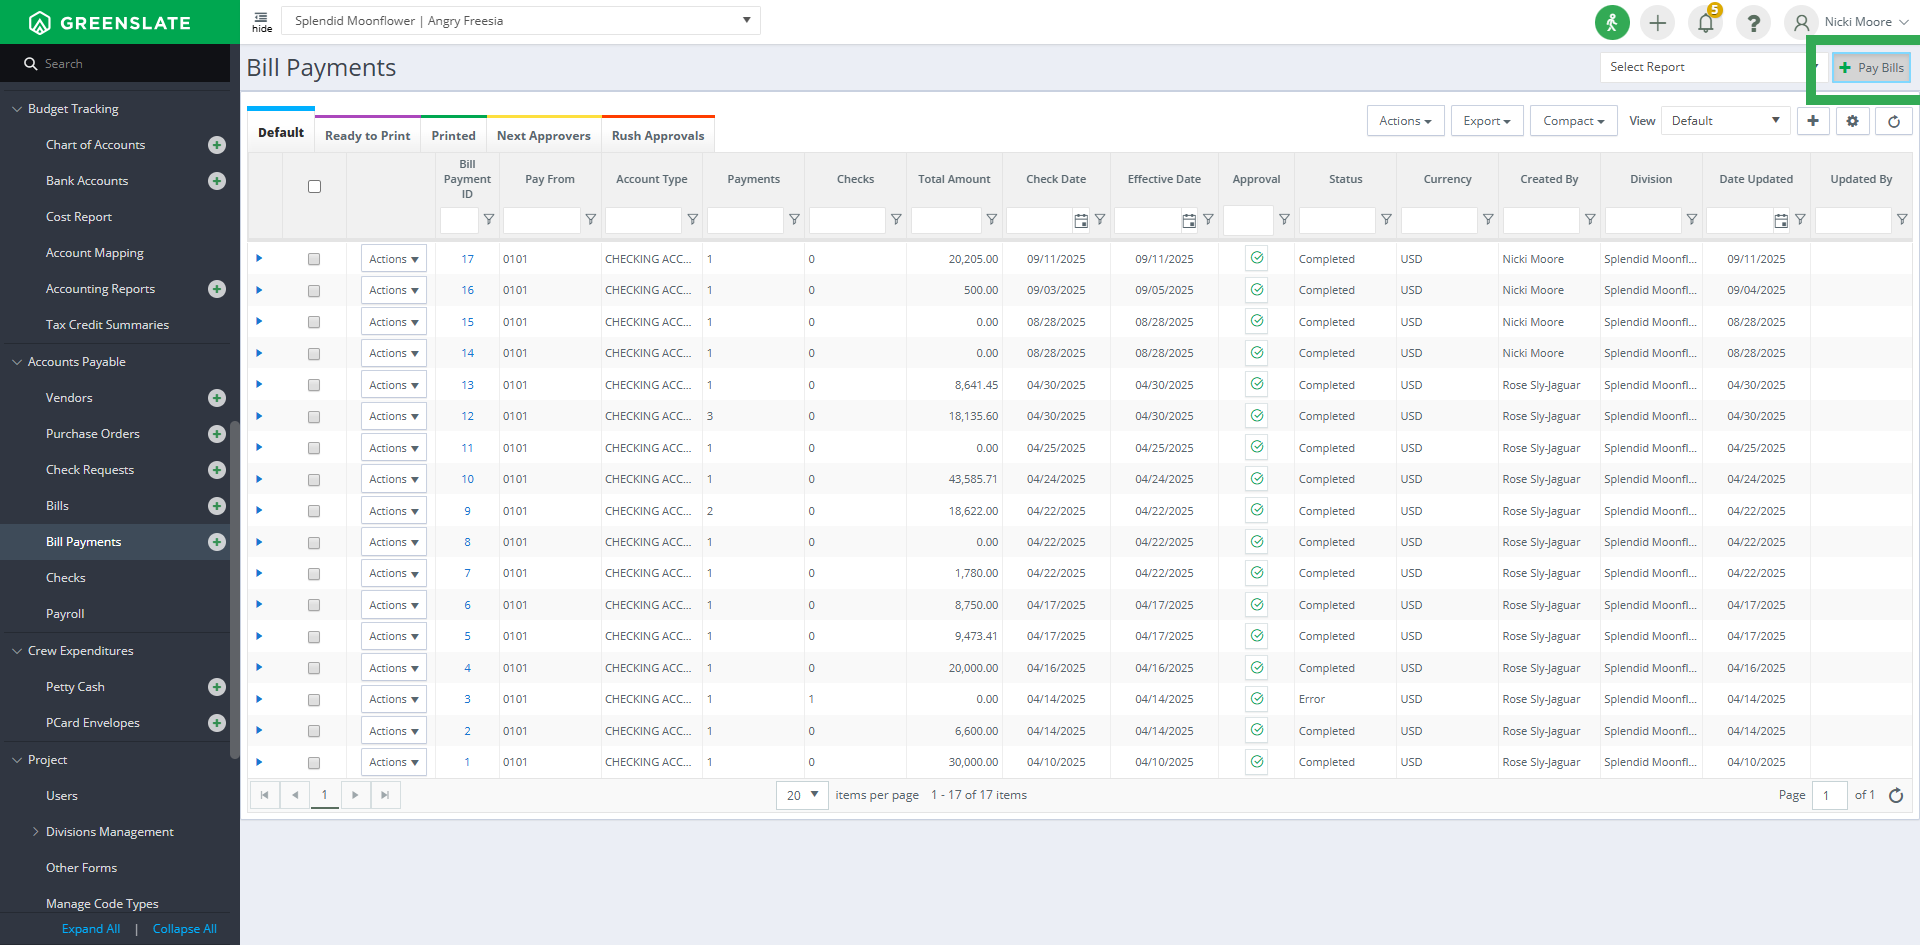
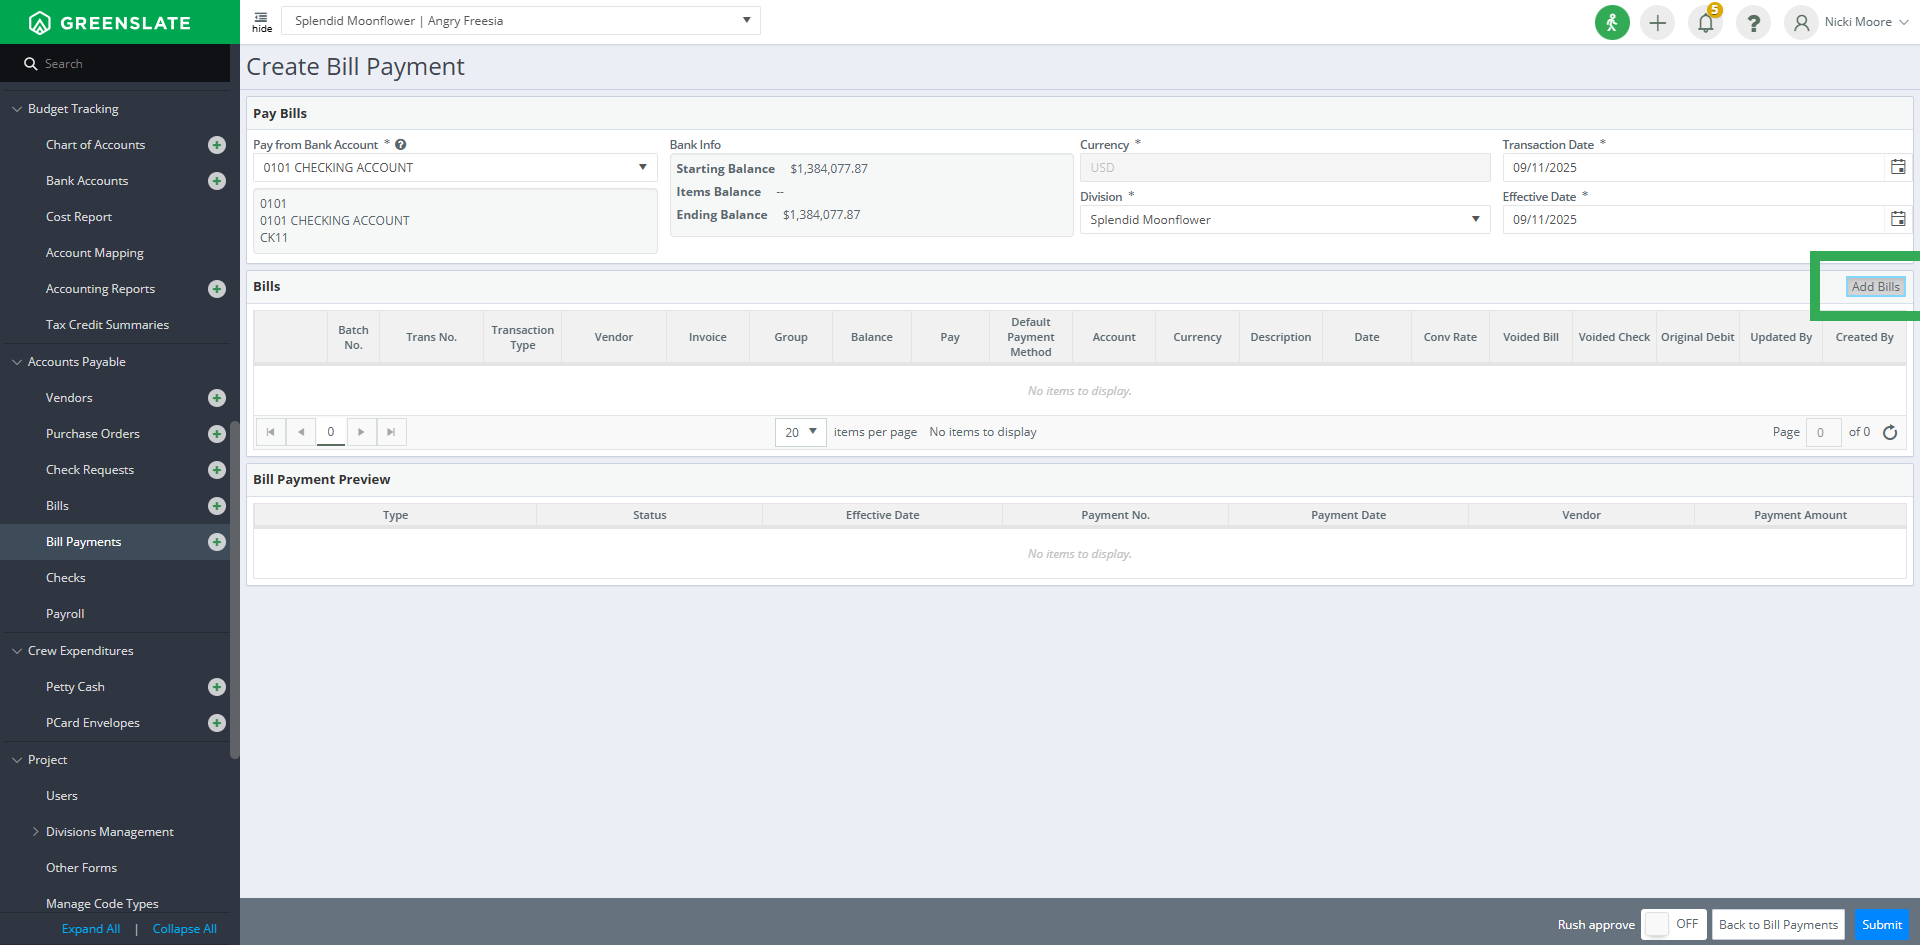
2. Click "Pay Bills"
Next, click on "Pay Bills" in the top right corner of the screen.
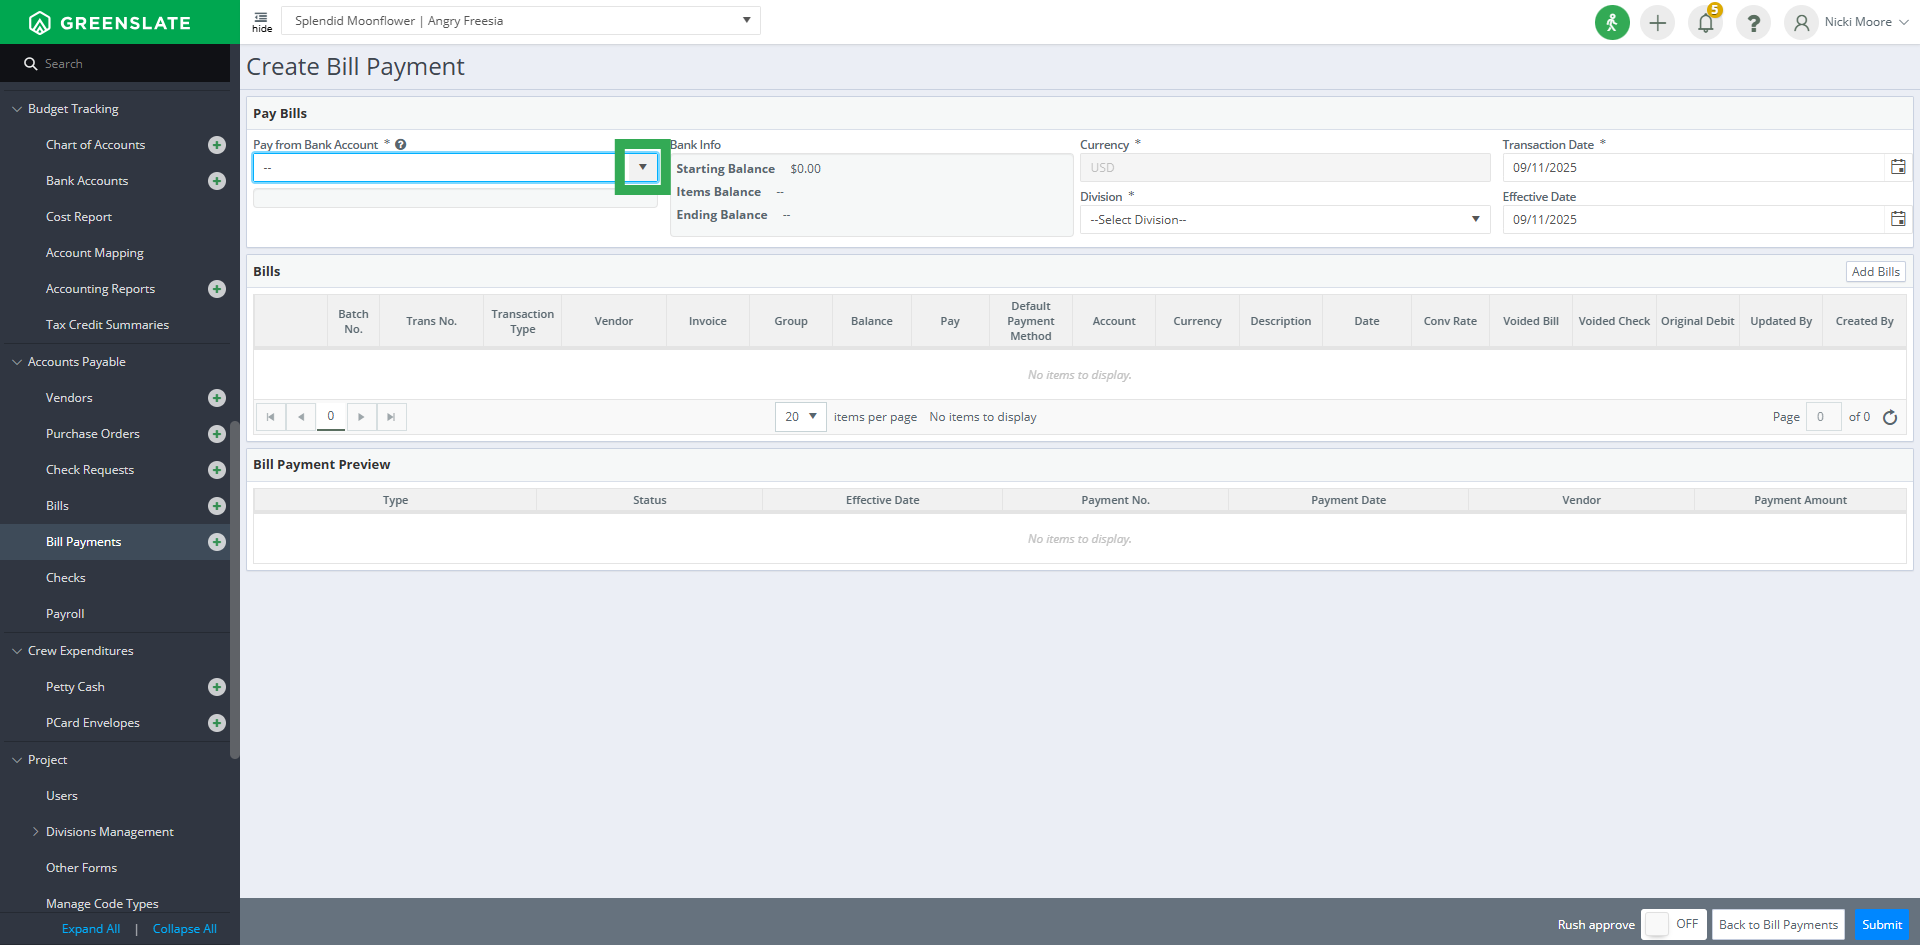
3. Choose the "Pay from Bank Account"
From the "Pay from Bank Account" dropdown menu, choose the payment account.
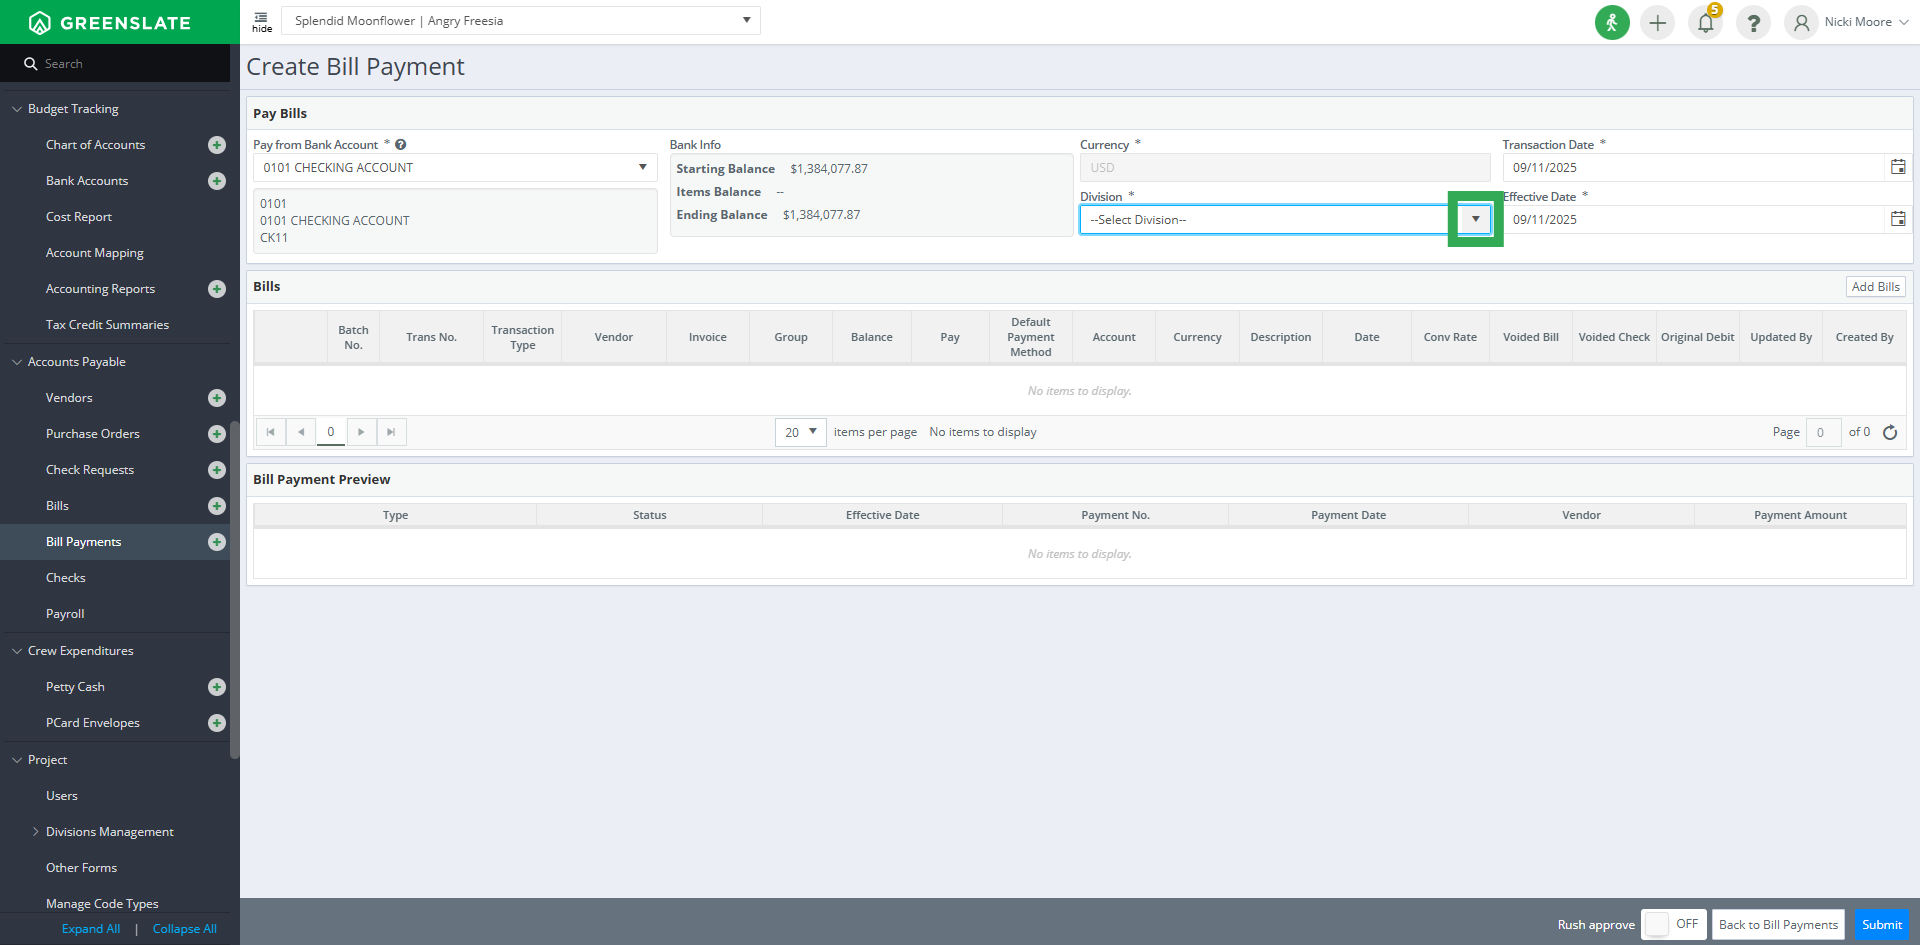
4. Select the "Division"
If your project uses divisions, click on the "Division" dropdown menu to choose one.
5. Click "Add Bills"
Next, click on "Add Bills" to add bills to your payment list.
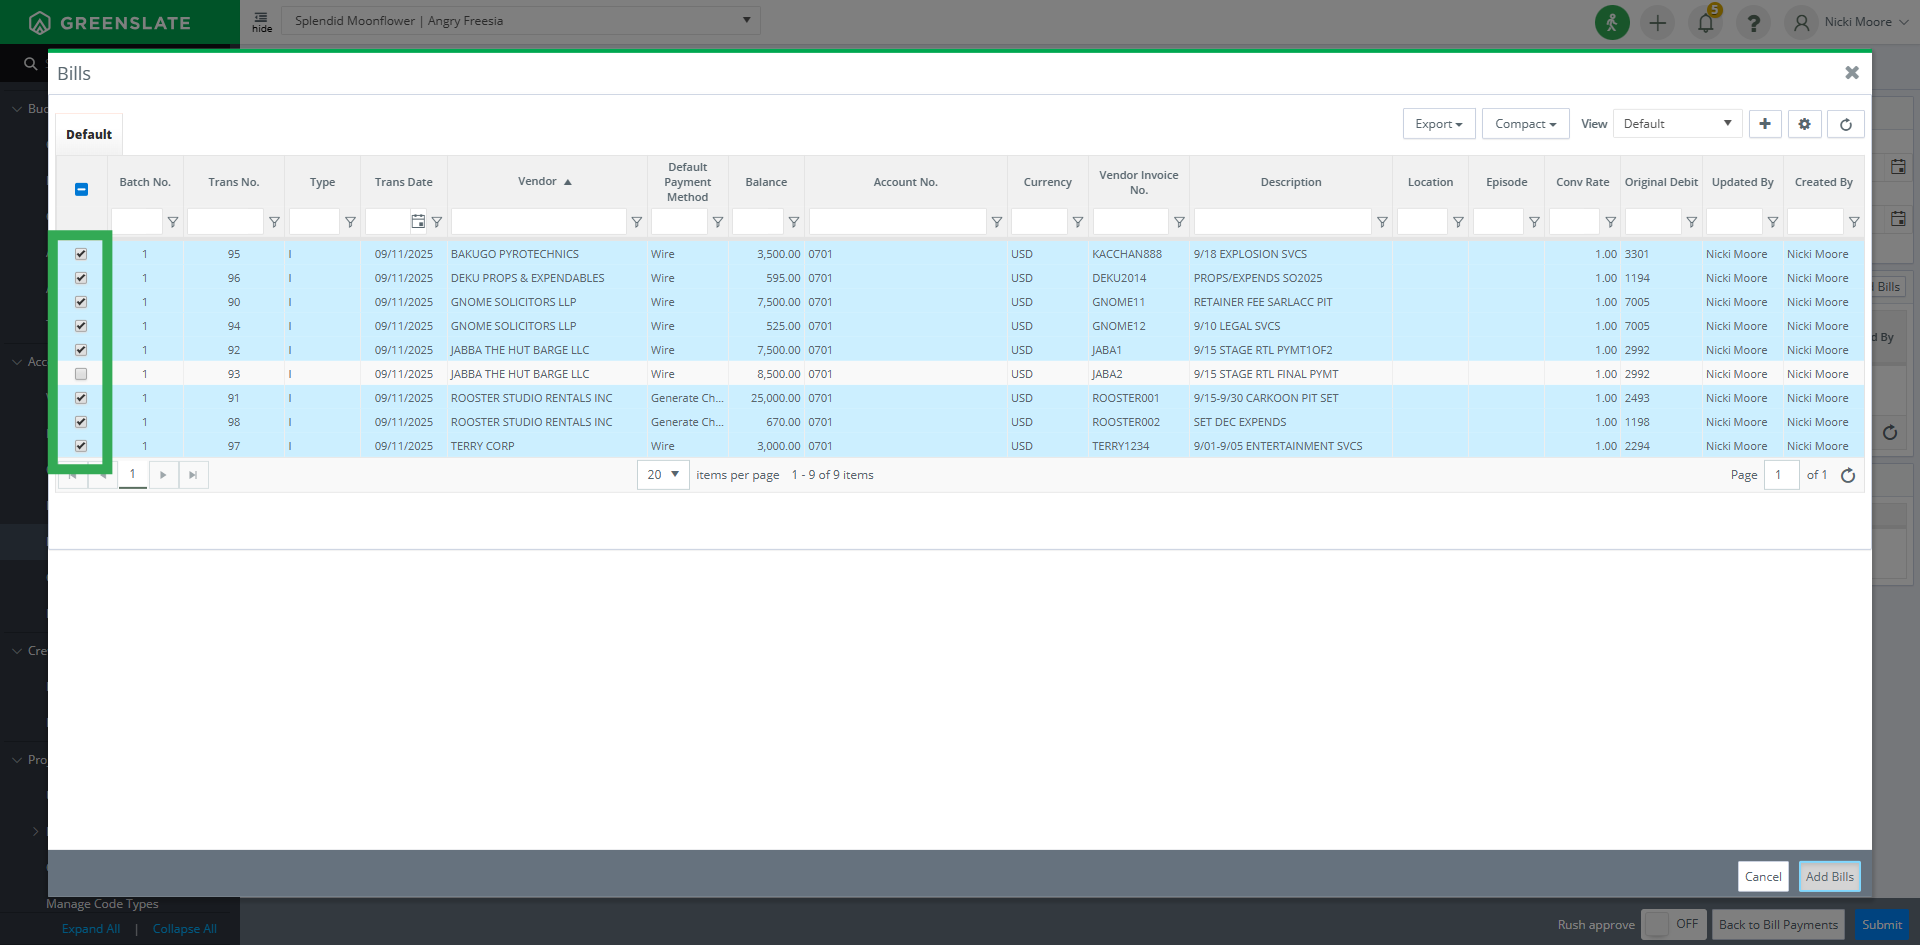
6. Select bills to pay
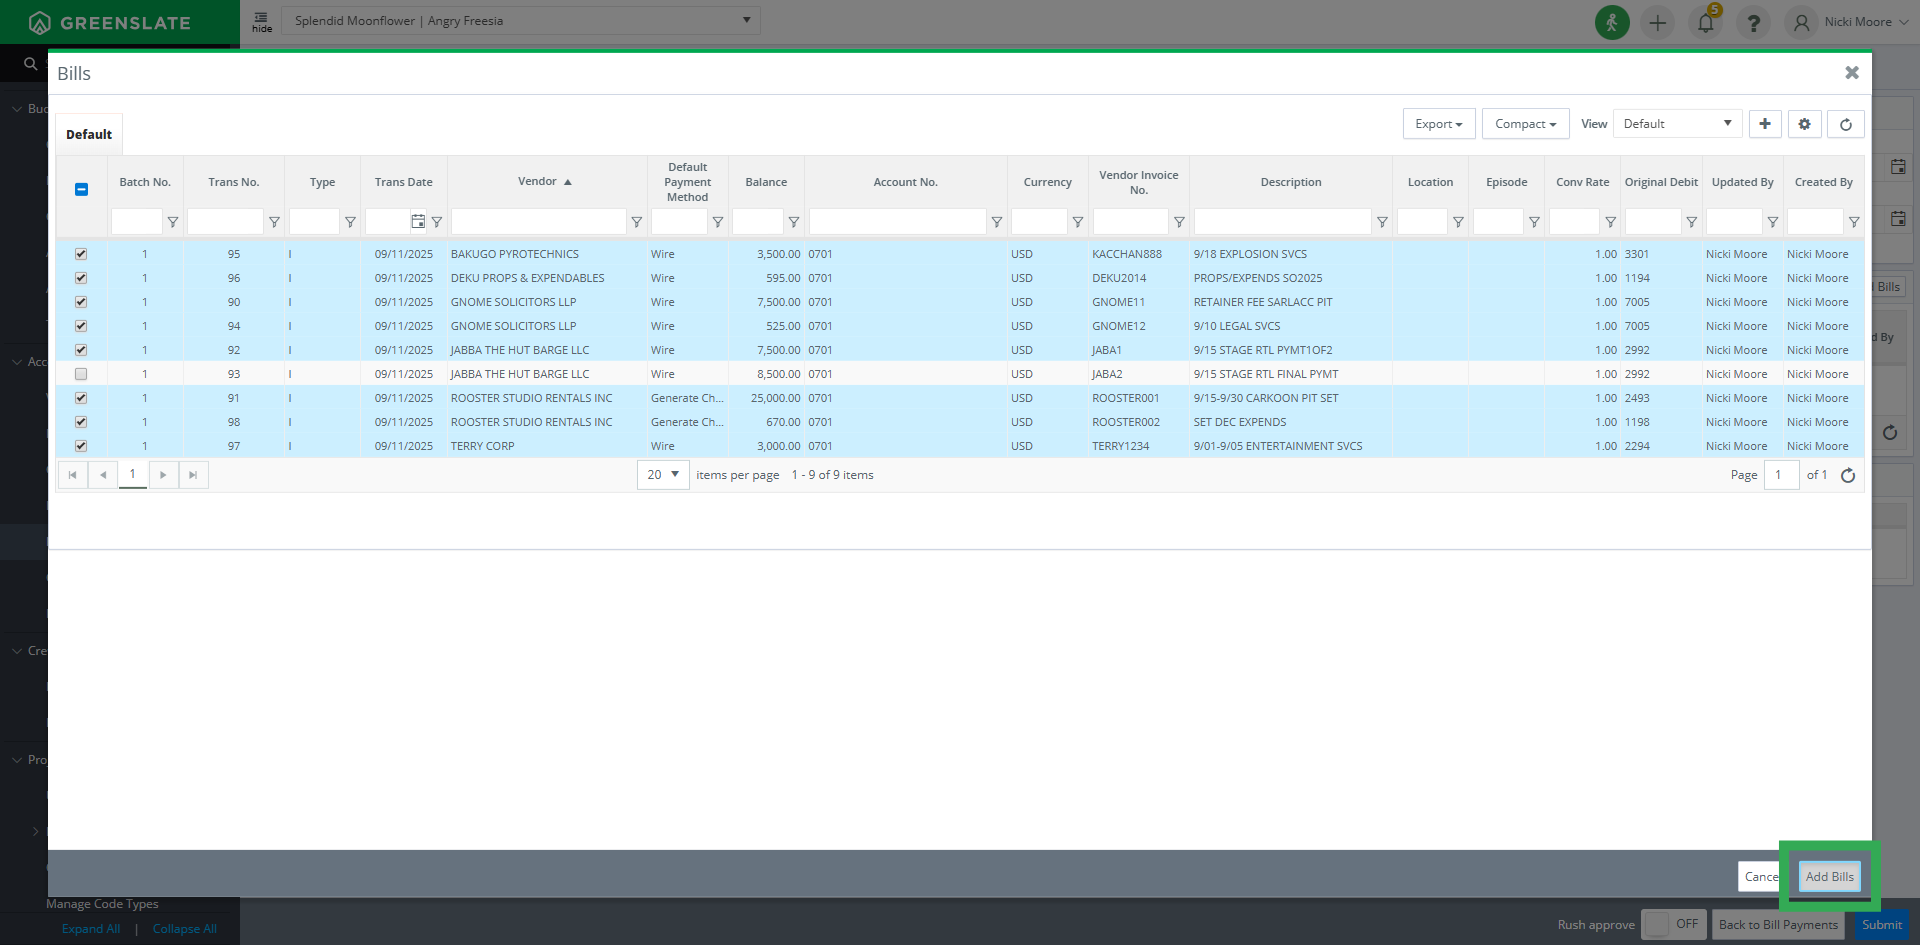
7. Click "Add Bills"
Then, click on "Add Bills" to confirm the bills included in your payment batch.
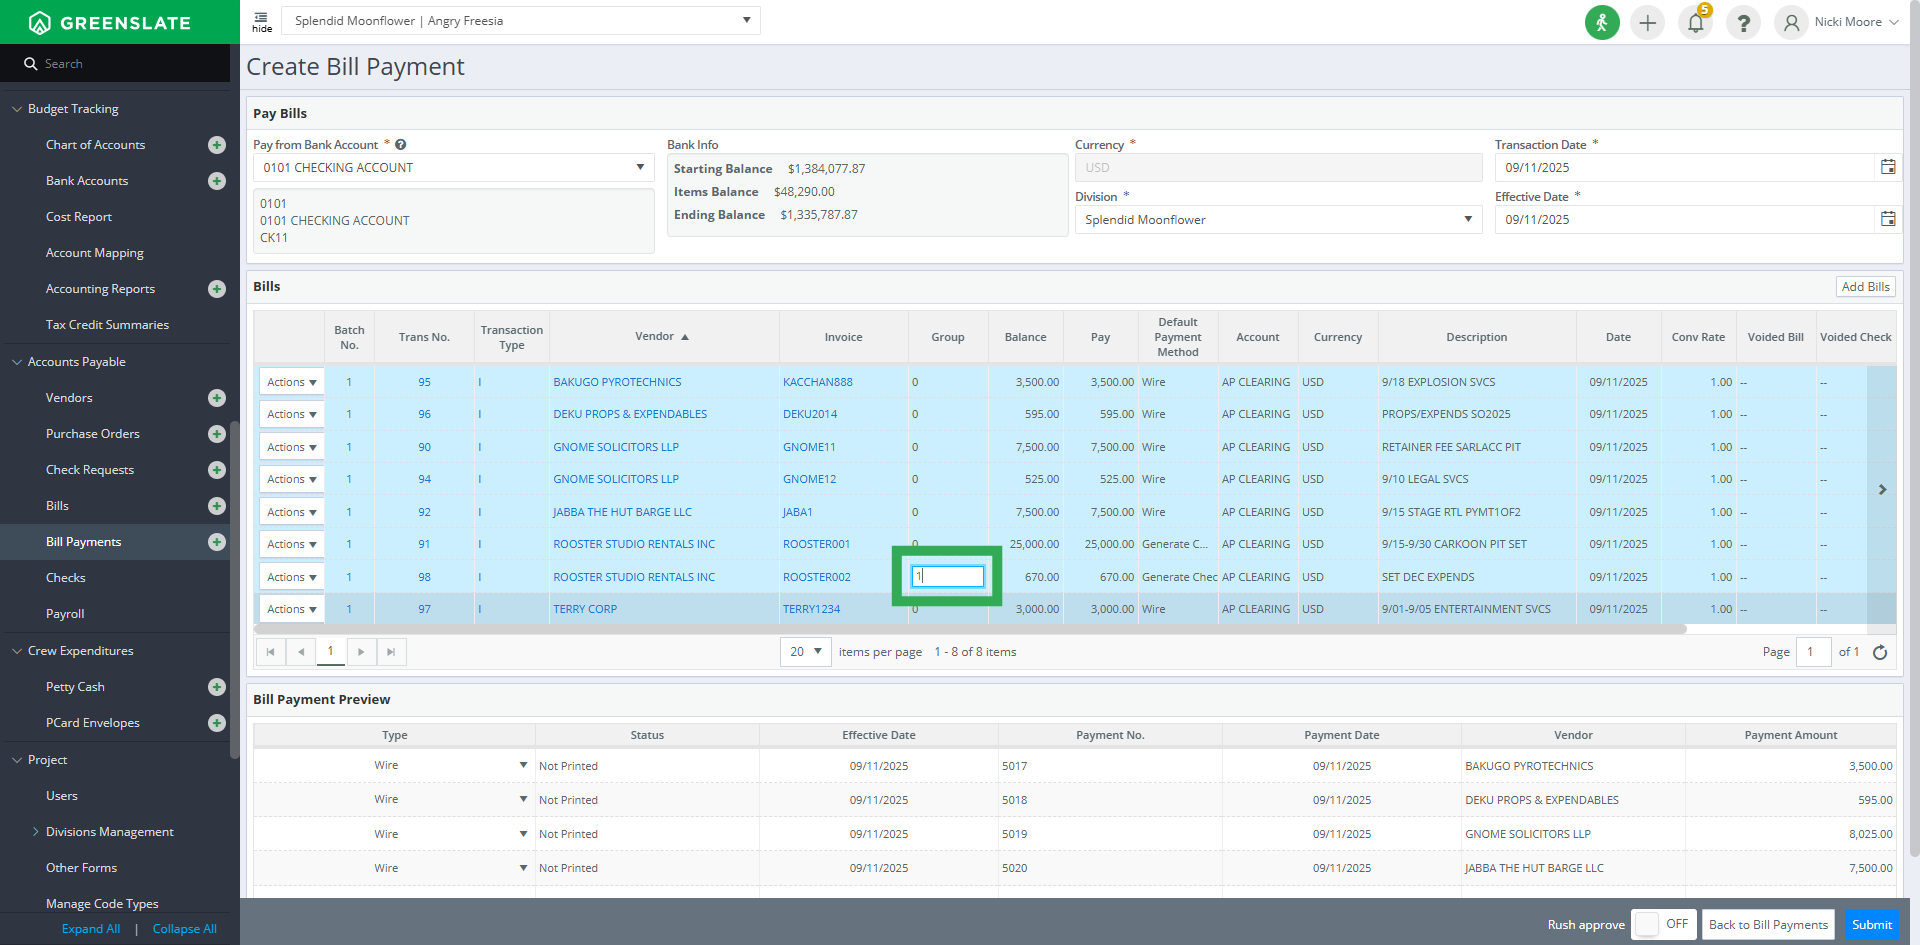
8. Use the "Group" column
To print separate checks for vendors with multiple bills in the batch, change the number in the "Group" column.
9. Click "Submit"
When you're ready, click "Submit" to complete and submit your bill payment.
That's it. You have successfully created and submitted a bill payment in GreenSlate. If you have any questions or need more help, please visit our Help Center or reach out via our online chat or email at help@gslate.com.